Create and Import Circuits
Circuits in the RF Design and Analysis App
In this app, you can create circuits that include RF components and RF networks. Networks can contain both components and other networks.
Note
In the circuit object command line interface, you create networks by building components and then connecting them together to form a network. In contrast, you build networks in the app by creating a network and then populating it with components.
Create RF Components
This section contains the following topics:
Available RF Components
The following table lists the RF components you can create using the app and the corresponding RF Toolbox™ object.
RF Component | Corresponding RF Object |
|---|---|
Data File | |
Delay Line | |
Coaxial Transmission Line | |
Coplanar Waveguide Transmission Line | |
Microstrip Transmission Line | |
Parallel-Plate Transmission Line | |
Transmission Line | |
Two-Wire Transmission Line | |
Series RLC | |
Shunt RLC | |
LC Bandpass Pi | |
LC Bandpass Tee | |
LC Bandstop Pi | |
LC Bandstop Tee | |
LC Highpass Pi | |
LC Highpass Tee | |
LC Lowpass Pi | |
LC Lowpass Tee |
Add an RF Component to a Session
In the RF Component List pane, click Add to open the Create Network or Component dialog box.
In the Create Network or Component dialog box, select Component.
In the Component Name field, enter a name for the component. This name is used to identify the component in the RF Component List pane. For example, Microstrip Component.
From the Component Type menu, select the type of RF component you want to create. For example,
Microstrip Transmission Line.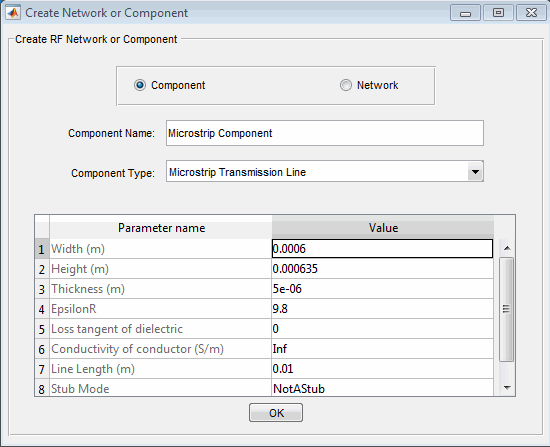
Adjust the parameter values as necessary.
Note
You can accept the default values for some or all of the parameters and then change them later. For information on modifying the parameter values of an existing component, see Modify Component Data.
Click OK.
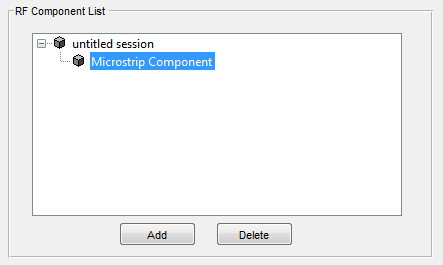
The app adds the component to your session.
Create RF Networks
You create an RF network using the app by adding a network to the session and then adding components to the network.
This section contains the following topics:
Available RF Networks
The following table lists the RF networks you can create using the app.
RF Network | Corresponding RF Toolbox Object |
|---|---|
Cascaded Network | |
Series Connected Network | |
Parallel Connected Network | |
Hybrid Connected Network | |
Inverse Hybrid Connected Network |
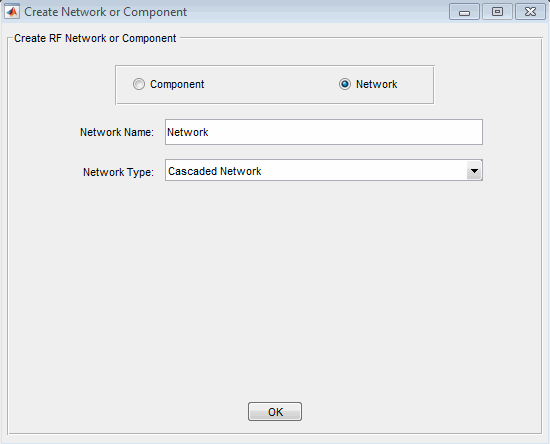
Add an RF Network to a Session
In the RF Component List pane, click Add to open the Create Network or Component dialog box.
In the Create Network or Component dialog box, select the Network option button.
In the Network Name field, enter a name for the component. This name is used to identify the network in the RF Component List pane. For example, Series1.
From the Network Type menu, select the type of RF network you want to create. For example,
Series Connected Network.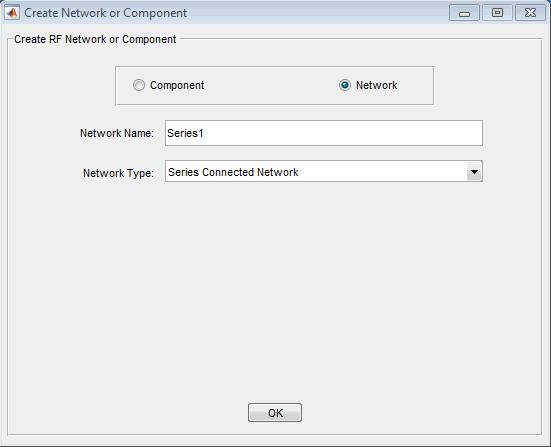
Click OK.
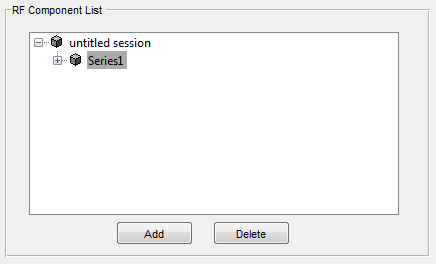
The RF Component List pane shows the new network.
Populate an RF Network
After you create a network using the app, you must populate it with RF components and networks. You insert a component or network into a network in much the same way you add one to a session.
To populate an RF network:
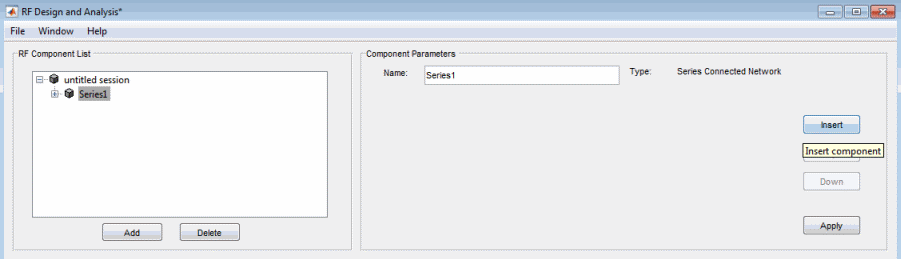
In the RF Component List pane, select the network component you want to modify. Then, in the Component Parameters pane, click Insert.
The Insert Component or Network dialog box appears.
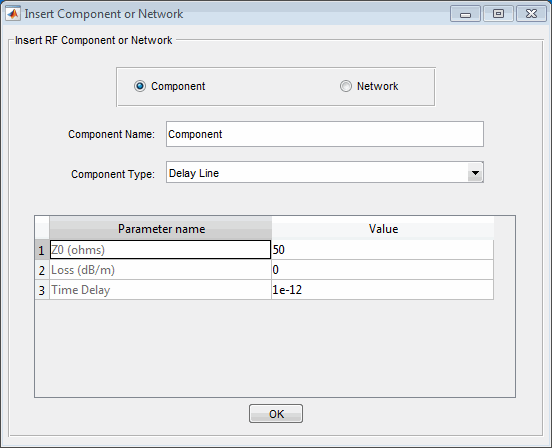
Click Component or Network in the Insert Component or Network dialog box to add either a component or a network.
Enter the component or network name, and select the appropriate type. If you are inserting a component, modify the parameter values as necessary. See Add an RF Component to a Session or Add an RF Network to a Session for details.
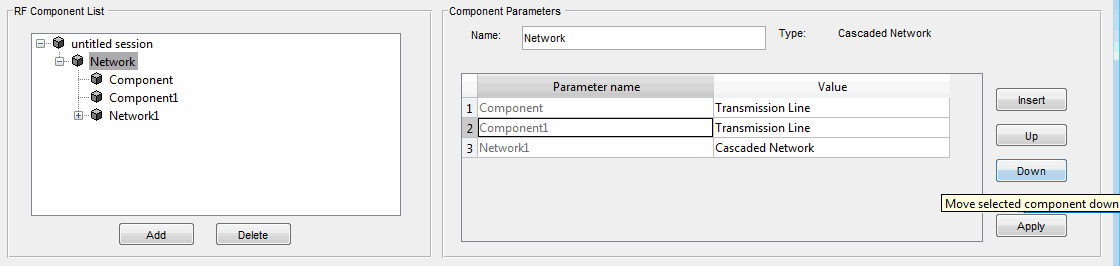
As you insert components and networks into a network, they are reflected in the RF Component List and Component Parameters panes. The figure below shows an example of a cascaded network that contains two components and a network. The subnetwork, in turn, contains two components.

Reorder Circuits Within a Network
To change the order of the components and networks within a network:
In the RF Component List pane, select the network whose circuits you want to reorder.
In the Component Parameters pane, select the circuit whose position you want to change.
Click Up or Down until the circuit is where you want it.
To reverse the positions of Component1 and Network1 in
the network shown in the following figure:
Select
Networkin the RF Component List pane.Select
Component1in the Component Parameters pane.Click Down in the Component Parameters pane.
Import RF Objects into the RF Design and Analysis App
The RF Design and Analysis app lets you import RF objects from your workspace and from files to the top level of your session. You can import the following types of objects:
Complex component and network objects that you created in your workspace using RF Toolbox objects.
Components and networks you exported into your workspace from another session.
For information on exporting components and networks from another session, see Export RF Objects.
After you have imported an object, you can change its name and work with it as you would any other component or network.
This section contains the following topics:
Import from the Workspace
To import RF circuit objects from the MATLAB® workspace into your session:
Select Import From Workspace from the File menu. The Import from Workspace dialog box appears. This dialog box lists the handles of all RF circuit (
rfckt) objects in the workspace.
From the list of RF circuit objects, select the object you want to import, and click OK.
The object is added to your session with the same name as the object handle. If there is already a circuit by that name, the app appends a numeral, starting with 1, to the new circuit name.
Import from a File into a Session
You can import RF components from the following types of files into the top level of your session:
S2P
Y2P
Z2P
H2P
To import a component from one of these files:
Select Import From File from the File menu. A file browser appears.
Select the file type you want to import.
Select the name of the file to import from the list of files in the browser.

Click Open to add the object to your session as a component.

The name of the component is the file name without the extension. If there is already a component by that name, the app appends a numeral, starting with 1, to the new component name. The file name, including the extension, appears as the value of the component's
File Nameparameter. If the file is not on the MATLAB path, the value of theFile Nameparameter also contains the file path.
Import from a File into a Network
You can import RF components from the following types of files into a network:
S2P
Y2P
Z2P
H2P
To import an RF component from a file into a network:
Insert a Data File component into the network.
For more information on how add a component to a network, see Populate an RF Network.
Specify the name of the file from which to import the component in one of two ways:
Select the file name in the file name and type in the Import from File dialog box, and click Open.
Click Cancel to get out of the Import from File dialog box, and enter the file name in the Value field across from the File Name parameter in the Insert Component or Network dialog box.
Model an RF Network shows this process.