Deep Learning in Simulink Using MATLAB Function Block
You can generate optimized code for prediction or detection of a variety of trained deep
learning networks in your Simulink® models. The MATLAB Function (Simulink) blocks contain code that uses
the coder.loadDeepLearningNetwork function to load a deep learning model
and to construct and set up a CNN class. The code also contains calls to the
predict or detect functions to predict/detect the
responses.. The generated code implements the deep convolutional neural network (CNN) by using
the architecture, the layers, and parameters that you specify in the input SeriesNetwork (Deep Learning Toolbox) or
DAGNetwork (Deep Learning Toolbox) object.
You can configure the code generator to take advantage of the NVIDIA® CUDA® deep neural network library (cuDNN) and TensorRT™ high performance inference libraries for NVIDIA GPUs.
You can configure the code generator to take advantage of the Intel® Math Kernel Library for Deep Neural Networks (MKL-DNN) when targeting Intel processors or the ARM® Compute Library for computer vision and machine learning when targeting ARM processors.
Example: Classify Images by Using GoogLeNet
GoogLeNet has been trained on over a million images and can classify images into 1000
object categories (such as keyboard, coffee mug, pencil, and animals). The network has
learned rich feature representations for a wide range of images. The network takes an image
as input, and then outputs a label for the object in the image together with the
probabilities for each of the object categories. This example show you how to perform
simulation and generate CUDA code for the pretrained googlenet deep convolutional
neural network and classify an image. The pretrained models are available as support
packages from the Deep Learning Toolbox™.
Load the pretrained GoogLeNet network. You can choose to load a different pretrained network for image classification. If you do not have the required support packages installed, install the software according to the instructions provided.
net = googlenet;
The object
netcontains theDAGNetworkobject. Use theanalyzeNetworkfunction to display an interactive visualization of the network architecture, to detect errors and issues in the network, and to display detailed information about the network layers. The layer information includes the sizes of layer activations and learnable parameters, the total number of learnable parameters, and the sizes of state parameters of recurrent layers.analyzeNetwork(net);

The image that you want to classify must have the same size as the input size of the network. For GoogLeNet, the size of the
imageInputLayeris 224-by-224-by-3. TheClassesproperty of the outputclassificationLayercontains the names of the classes learned by the network. View 10 random class names out of the total of 1000.classNames = net.Layers(end).Classes; numClasses = numel(classNames); disp(classNames(randperm(numClasses,10)))
    'speedboat'
    'window screen'
    'isopod'
    'wooden spoon'
    'lipstick'
    'drake'
    'hyena'
    'dumbbell'
    'strawberry'
    'custard apple'
Create GoogLeNet Model
Create a new Simulink model and insert a MATLAB Function block from the User-Defined Functions library.
Add a Image From File (Computer Vision Toolbox) block from the Computer Vision Toolbox™ library and set the
File nameparameter topeppers.png. Add a Resize (Computer Vision Toolbox) block from the Computer Vision Toolbox library to the model. Set the Specify parameter of the Resize block toNumber of output rows and columnsand enter[224 224]as the value for Number of output rows and columns. This bock will resize the input image to that of the input layer of the network.
Double-click on the MATLAB Function block. A default function signature appears in the MATLAB Function Block Editor.
Define a function called
googlenet_predict, which implements the prediction entry-point function. The function header declaresinas an argument to thegooglenet_predictfunction, withscoresandindxTopas the as return value. Save Editor document to file.function [scores,indxTop] = googlenet_predict(in) %#codegen persistent mynet; if isempty(mynet) mynet = coder.loadDeepLearningNetwork('googlenet'); end % pass in input predict_scores = predict(mynet,in); [scores,indx] = sort(predict_scores, 'descend'); indxTop = indx(1:5);
A persistent object
mynetloads theDAGNetworkobject. At the first call to the entry-point function, the persistent object is constructed and set up. On subsequent calls to the function, the same object is reused to callpredicton inputs, avoiding reconstructing and reloading the network object.You can also use the
activations(Deep Learning Toolbox) method to network activations for a specific layer. For example, the following line of code returns the network activations for the layer specified inlayerIdx.out = activations(mynet,in,layerIdx,'OutputAs','Channels');
You can also use the
classify(Deep Learning Toolbox) method to predict class labels for the image data ininusing the trained network,mynet.[out,scores] = classify(mynet,in);
For LSTM networks, you can also use the
predictAndUpdateState(Deep Learning Toolbox) andresetState(Deep Learning Toolbox) methods. For usage notes and limitations of these method, see Supported Functions.Right-click on the MATLAB Function block and select
Block Parameters (Subsystem).On the Code Generation tab, select
Reusable
              function
for Function packaging.Connect these blocks as shown in the diagram. Save the model as
googlenetModel.
Configure the Model for GPU Acceleration
Model configuration parameters determine the acceleration method used during simulation.
Open the Configuration Parameters dialog box, Solver pane. To compile your model for acceleration and generate CUDA code, you must configure the model to use a fixed-step solver. The following table shows the solver configuration for this example.
Parameter Setting Effect on Generated Code Type Fixed-stepMaintains a constant (fixed) step size, which is required for code generation Solver discrete (no continuous states)Applies a fixed-step integration technique for computing the state derivative of the model Fixed-step size autoSimulink chooses the step size 
Select the Simulation Target pane. Set the Language to
C++.Select GPU acceleration. GPU Coder™ specific options are now visible in the Simulation Target > GPU Acceleration pane. For the purposes of this example, you can use the default values of these parameters.

On the Simulation Target pane. Set the Target Library in the Deep learning group to
cuDNN. You can also selectTensorRT.
Click OK to save and close the Configuration Parameters dialog box.
You can use
set_paramto configure the model parameter programmatically from the MATLAB® command Window. For example,set_param('googlenetModel','GPUAcceleration','on');
Building the GPU Accelerated Model
To build the GPU accelerated model and simulate it, you can start the model by selecting Run on the Simulation tab or by running the command:
sim('googlenetModel');at the MATLAB prompt.
The software first checks to see if CUDA/C++ code was previously compiled for your model. If code was created previously, the software runs the model. If code was not previously built, the software first generates and compiles the CUDA/C++ code, and then runs the model. The code generation tool places the generated code in a subfolder of the working folder called
slprj/_slprj/googlenetModel.Display the top five predicted labels and their associated probabilities as a histogram. Because the network classifies images into so many object categories, and many categories are similar, it is common to consider the top-five accuracy when evaluating networks. The network classifies the image as a bell pepper with a high probability.
im = imread('peppers.png');
classNamesTop = classNames(out.yout{2}.Values.Data(:,:,1))

h = figure;
h.Position(3) = 2*h.Position(3);
ax1 = subplot(1,2,1);
ax2 = subplot(1,2,2);

image(ax1,im);
barh(ax2,out.yout{1}.Values.Data(1,5:-1:1,1))
xlabel(ax2,'Probability')
yticklabels(ax2,classNamesTop(5:-1:1))
ax2.YAxisLocation = 'right';
sgtitle('Top 5 predictions using GoogLeNet')

Configure the Model for Code Generation
The model configuration parameters provide many options for the code generation and build process.
Select the Code Generation pane. Set the System target file to
grt.tlc. You can also use the Embedded Coder® target fileert.tlc.Set the Language to
C++.Select Generate GPU code. GPU Coder specific options are now visible in the Code Generation > GPU Code pane.
Select Generate code only.
Select the Toolchain. For Linux® platforms select
NVIDIA CUDA | gmake (64-bit
              Linux)
. For Windows® systems, selectNVIDIA CUDA (w/Microsoft Visual C++ 20XX) | nmake (64-bit windows).On the Code Generation > Report pane, select Create code generation report and Open report automatically.
On the Code Generation > Interface pane, set the Target Library in the Deep learning group to
cuDNN. You can also selectTensorRT.For the purposes of this example, you can use the default values of the GPU-specific parameters in Code Generation > GPU Code pane.
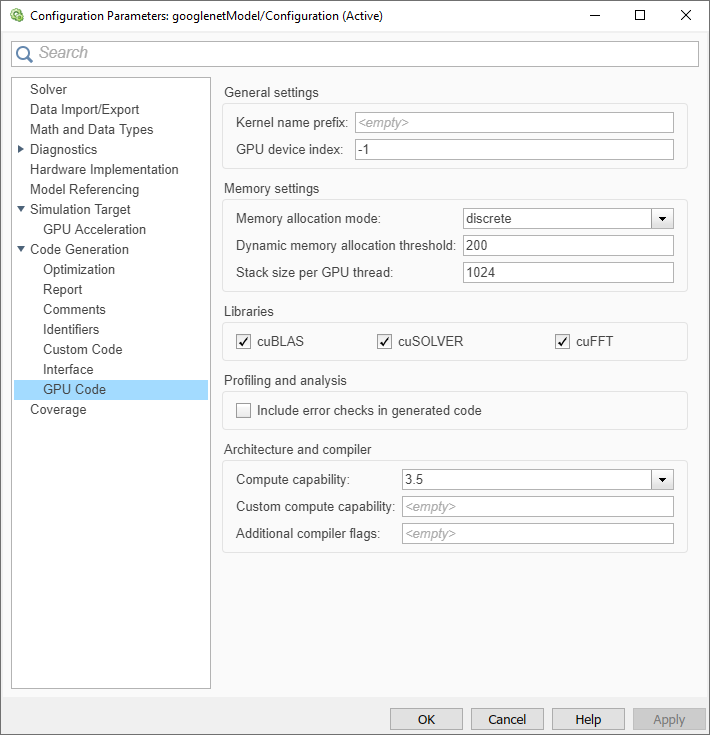
Click OK to save and close the Configuration Parameters dialog box.
You can also use
set_paramto configure the model parameter programmatically from the MATLAB command Window. For example,set_param('googlenetModel','GenerateGPUCode','CUDA');
Generate CUDA Code for the Model
In the Simulink Editor, open the Simulink Coder app.
Generate code.
Messages appear in the Diagnostics Viewer. The code generator produces CUDA source and header files, and an HTML code generation report. The code generator places the files in a build folder, a subfolder named
googlenetModel_grt_rtwunder your current working folder.Example of the generated CUDA code.
Limitations
Code generation for a deep learning network with custom layer is not supported in Simulink.
The Intel Math Kernel Library for Deep Neural Networks (MKL-DNN) requires
C++11standard. Setting the Target Library in the Deep learning group toMKL-DNNautomatically generatesC++11code.Use of MATLAB Function blocks in Stateflow® charts is not supported.
When GPU acceleration is enabled, the code generator does not support Import custom code for importing custom authored CUDA source files (*.cu). Instead, use
coder.cevalinside the MATLAB Function block.MATLAB Function block does not support all the data types from the MATLAB language. For supported data types, refer to the block documentation.
See Also
Functions
rtwbuild(Simulink Coder) |bdclose(Simulink) |close_system(Simulink) |get_param(Simulink) |load_system(Simulink) |open_system(Simulink) |save_system(Simulink) |set_param(Simulink) |sim(Simulink)